The Journal Entry Import tool is helpful for any accounting manager user who needs to import data. This is most commonly needed when using an external software, such as a payroll provider, Bill.com, Expensify, or other software option. To import a journal entry, you will export data from your external system, format it to the provided Aplos import template, and import it to your Journal Entry Import page.
If you prefer to import transactions into a register instead of as a journal entry, you can use the manual transaction import. You can see more about that tool from the Importing Transactions Guide.
Formatting Your Import File
Download Journal Entry Import Template
You’ll find the Aplos import template on your Journal Entry import page.
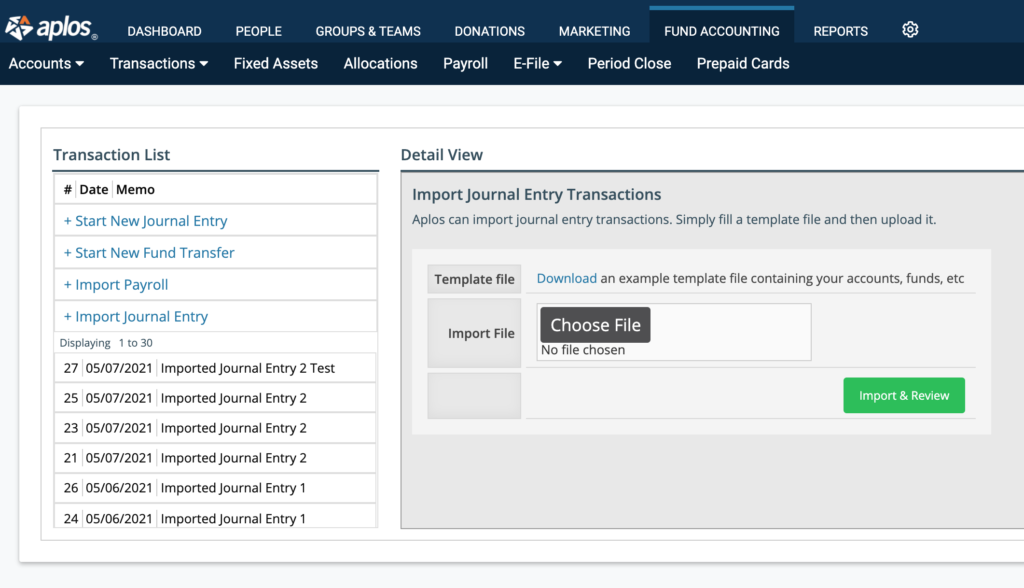
Once downloaded, you can open the template. The first tab titled “Imports” is a templated format for your journal entry. The following tabs include the list of your accounts, funds, and tags that are available in Aplos. When formatting your file, do not add any columns or rename any of the columns in the template.
Journal Entry Date And Memo
For each journal entry, a Date and Memo are required. This is the unique identifier to distinguish when a new journal entry starts. You will need to note one date and memo only on the first row of your journal entry.
In the template example below, two journal entries are being imported, so the date and memo are listed on rows 2 and 4 only.

Note: If you enter a date and/or memo on each row, it will import unbalanced journal entries and you will get an error message.
Assigning Account, Fund, And Amounts
Next, you will need to enter your account and fund for your journal entry import.
- Your account will need to follow the format shown in the image above of (NUMBER – NAME).
- The fund can be the number and name, the fund name, or just the fund number.
To improve efficiency, utilize the tabs in the worksheet to copy and paste the accounts, funds, or tags into the corresponding cells. This will provide you with the correct formatting for your accounts and improve the success of your import.

Entering A Payee And Note
Both the Payee and Note fields are optional and do not require a value to complete the import. If a payee and/or note is associated with a journal entry, you can enter the value under the Payee and/or Note column. Enter the value(s) once in the first line of the associated journal entry. When uploaded into Aplos, the import tool will verify if the payee exists by matching the value in the Payee column to your contact database. If the contact does not exist, the import tool will create a new contact in Aplos. To avoid creating a duplicate contact, ensure the spelling of the payee matches the entry in the contact database exactly. When uploading and reviewing your file, you can view any new contacts that will be created when the import is completed.

Payee and Note are optional fields.
Debit And Credit Amounts
Each journal entry line will consist of either a debit or credit amount, but not both. All values should be positive amounts. To begin, enter the debit or credit amount for the associated line item into the Debit or Credit columns. The debits and credits must be equal to make the entry balanced.

Assigning A Tag
If you have tags enabled, you’ll also have the option to include a tag. The tag formatting can be the number and name (100 – North Campus), the tag name (North Campus), or just the tag number (100). You can also utilize the tabs in the worksheet to copy and paste the tags into the corresponding cells. If your organization requires tags per transaction, it is recommended to include tags in the import. However, it is not required, and you can edit the journal entry after you import your file and post the entries to add any required tags.The import template will have columns added to the right of the Credit column for your tag layers. To check if you have tags enabled, you can view the Tag Management screen. You will enter your tag name for any split on your journal entry. For example, if you have tags for your departments, you will see “Tags: Campuses” as one of your
columns. If you have a campus tag for “North Campus,” you will enter that in the appropriate field.

Importing 990 Tags
If your organization has 990 tags enabled, a 990 tag is recommended when importing. However, you can complete the import without having 990 tags. You can also edit the journal entry after you import your file and post the entries to add 990 tags.
Save Journal Entry File
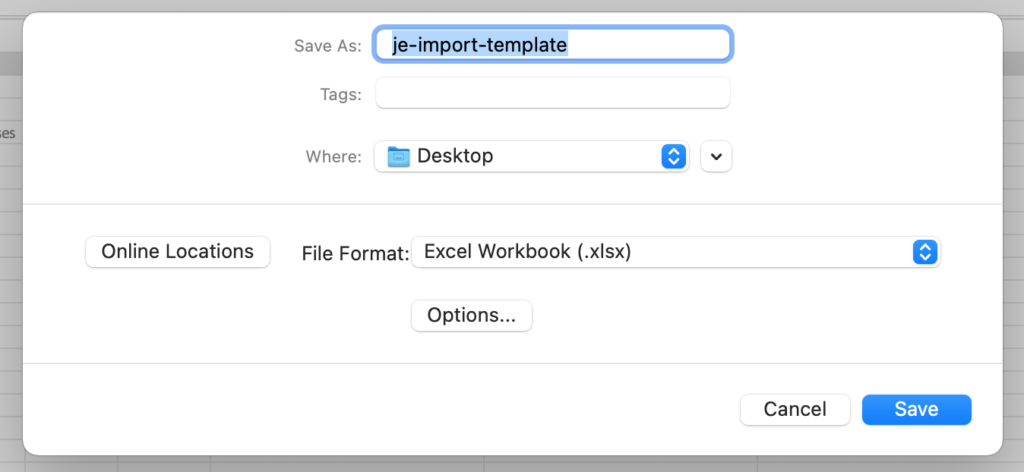
Once you review the data and ensure the accuracy of each journal entry, you will want to save the file under one of the following format types: .xlsx or .xls. To do so, click “File” and then “Save As” at the top of your screen. Choose where to save your worksheet, select the correct file format, and click “Save.”
Importing Your File
Upload Journal Entry Excel File
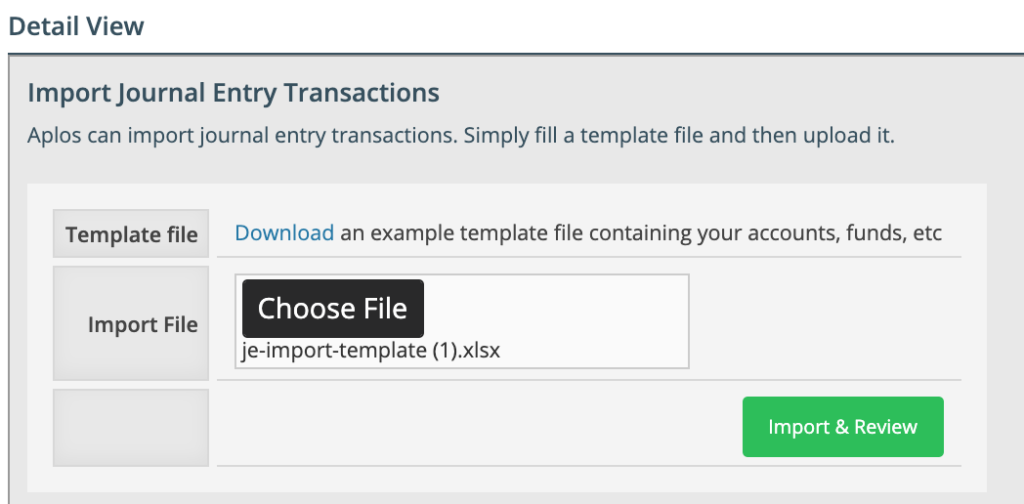
Once your file is formatted and you have saved it, you’re ready to import. On the Import Journal Entry screen, click the Choose File button and select your file. Then click “Import & Review.
Reviewing Your File
Once uploaded, you will review your imported file before completing the import and posting the journal entries in the system. On this screen you can review errors in your file and view new contacts that will be created by this import.
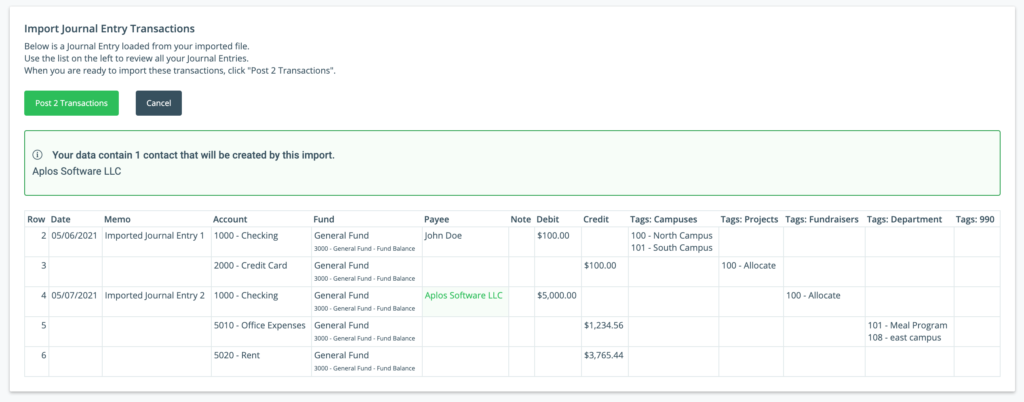
Post Transaction: You can post the transaction if there were no errors and you are ready to finish the import.
Cancel: You can click “Cancel” to go back to the Journal Entry screen and not import the file.
Note: If you leave the import page before selecting “Post Transaction,” it will cancel the import and delete the pending entries.
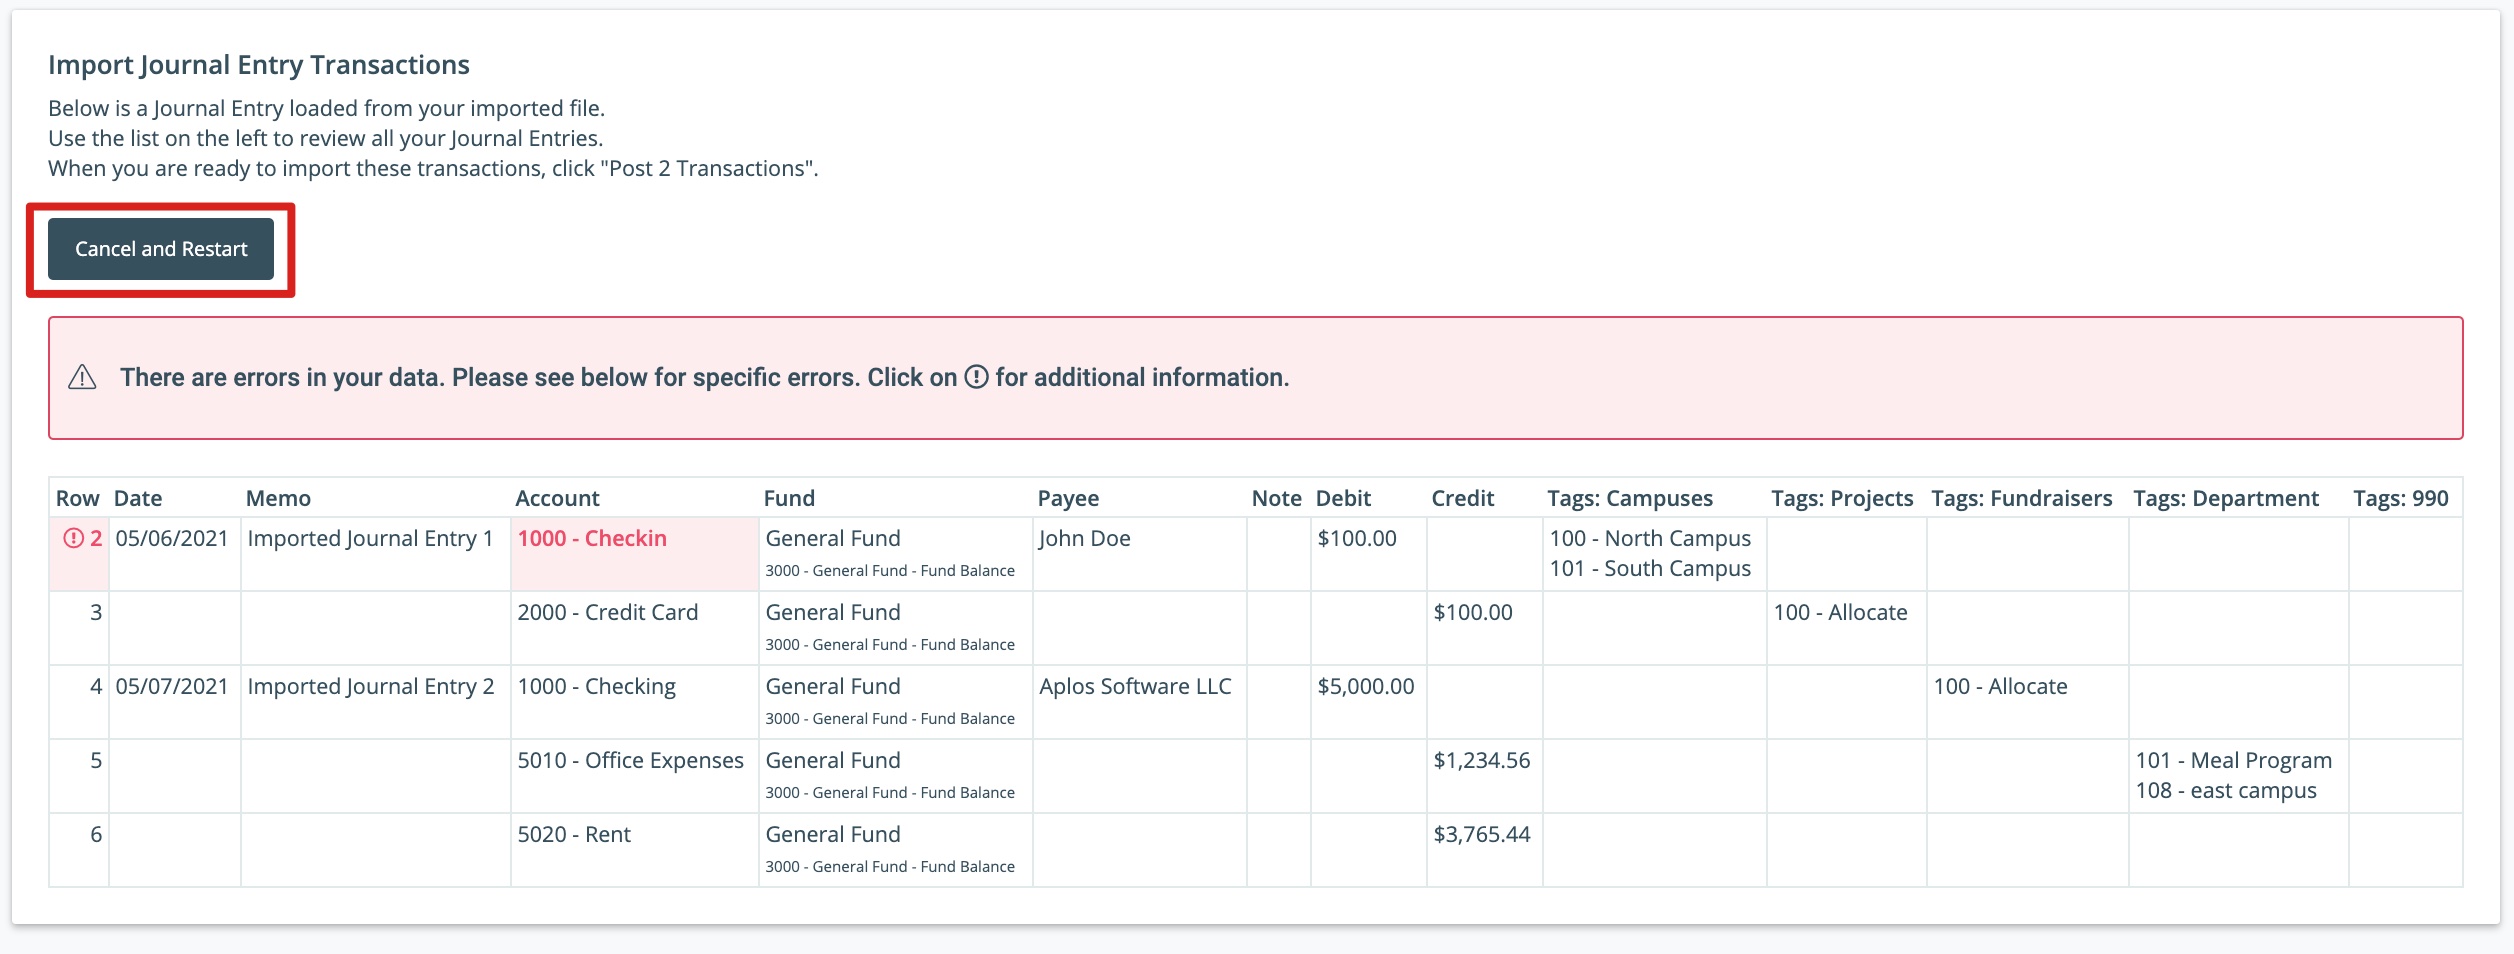
Cancel and Restart: If you have an error in your file, you will need to update the file in Excel to correct the error and re-import your file. From the review screen, click “Cancel and Restart.” This will take you back to the Journal Entry screen where you can follow the Importing Your File steps to continue.
Error Handling
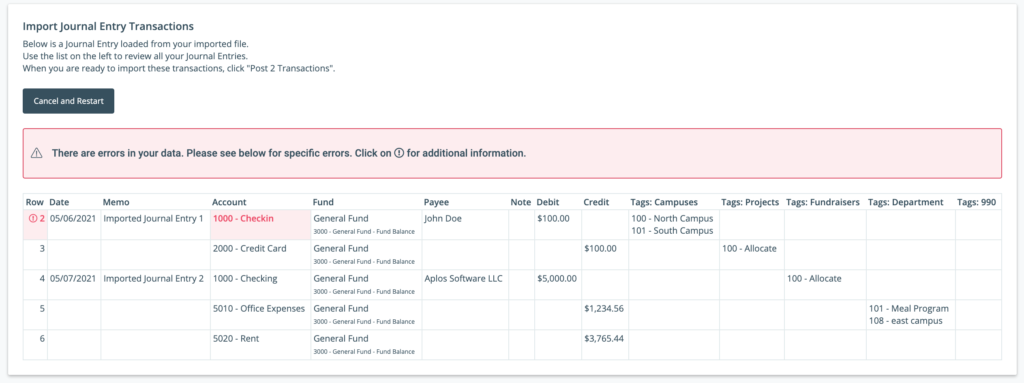
When there is an error in your file, you will see a message, and entries will show an alert symbol and red text in the Journal Entry File.
To successfully import your journal entries, you will need to update the file in Excel and re-import your file. From the review screen, click “Cancel and Restart.” This will take you back to the Journal Entry screen where you can follow the Importing Your File steps to continue.
There are several reasons why you may receive an error when importing your journal entry. Errors may occur if you have accounts or funds that do not match your Chart of Accounts, if you’ve forgotten to add a Memo, or if your entry is out of balance.
Unrecognized Account Or Fund
If you have included an unrecognized account or fund on your import template, you will see a red error message. You will need to enter the correct account or fund to proceed.
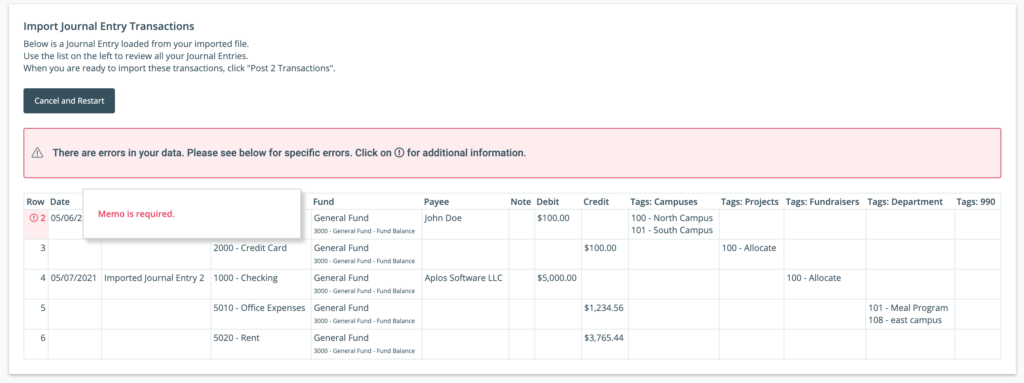
Importing Without A Memo
If you import your template and forget to include a memo for the journal entry, you will receive the following error, so don’t forget to enter a memo before posting.
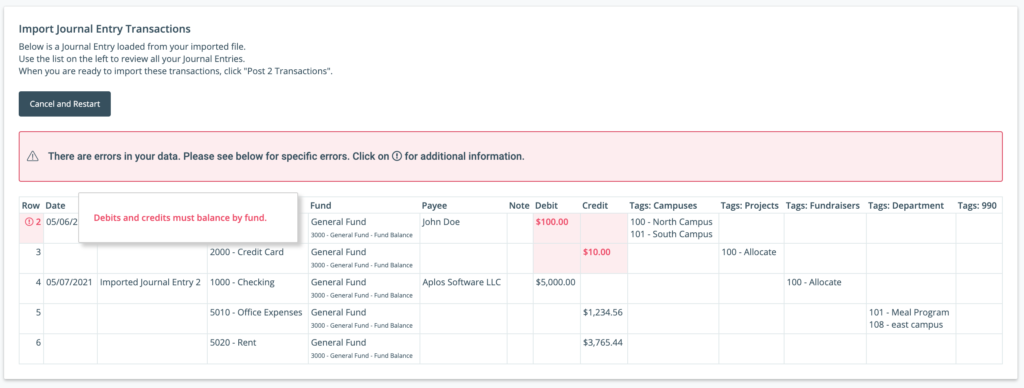
Out Of Balance Entry
You will receive an error if you import an entry that is either out of balance or out of balance by fund. You will need to update your entry to be in balance before you can post it. The cells in red will show how the entry is out of balance.
Importing Without A Date
If you import your template and a date is missing for any of the entries, the import will not recognize the individual entry and will skip to the next journal entry with a valid date. The journal entry with the missing date will become a part of the journal entry above. You’ll need to go back to your template, add a date on the missing row, and re-import.

Once errors are cleaned in the Excel file, you will be able to re-import and post any pending entries. Once you import them, they will hit your accounting. Until you post the entry, it is only pending and not yet applied to your accounting. If you leave your import page at any point, the pending entries will be deleted.
If you need assistance with this process, feel free to reach out to our Support Team.

