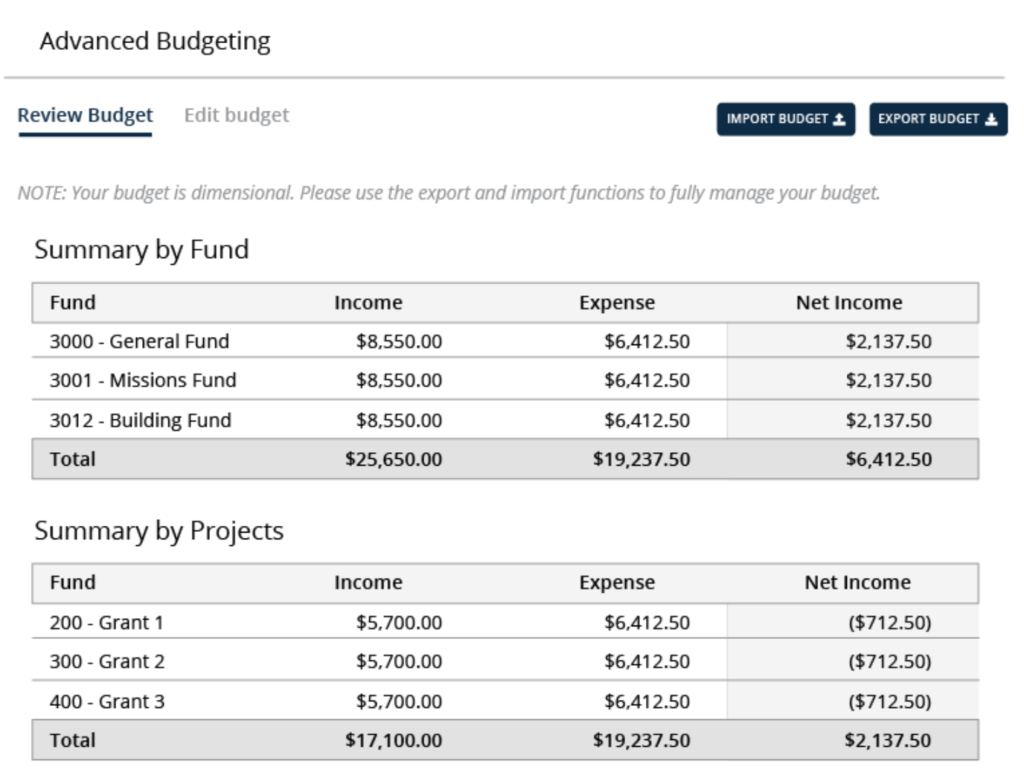
In Aplos, you have the ability to create an organizational budget that is allocated across your income and expense accounts to create Budget to Actual financial reports. With Advanced Budgeting enabled, you can also Budget by Fund or Budget by Tag. These types of budgets are independent and do not impact each other, meaning you can create your needed budgets separately and they will not conflict with each other.
If you need to allocate your budget across a combination of accounts, funds, and tags without creating multiple independent budgets, you can create a dimensional budget. This provides granular budgeting that breaks an organization’s budget down by accounts, funds, and/or tags to provide powerful insight into your budget across your entire organization.
Note: Requires enabling Advanced Budgeting
Creating A Dimensional Budget
Downloading The Excel Template
Due to the granular nature of a dimensional budget, it is required that you create your dimensional budget using the Aplos budgeting template that you edit in Excel and then import it into your Aplos account. To locate your budget template Excel file in your Aplos account, navigate to the Budgeting screen: Fund Accounting > Accounts > Budgeting. Click “Import” and then “Download” to begin downloading the template to your device.

Create Your Budget By Account, Fund, And Tag
Once the template downloads, open the budget template in Excel. The template is designed to be successfully imported into Aplos, so do not reformat or change the template beyond entering your accounts, funds, tags, and amounts inside the given cells.
When the file is opened, you will see your existing Aplos chart of accounts, along with last year’s actuals for each account. There will also be tabs for your existing accounts, funds, and tags that you can reference to copy and paste into your budget to ensure a successful import.
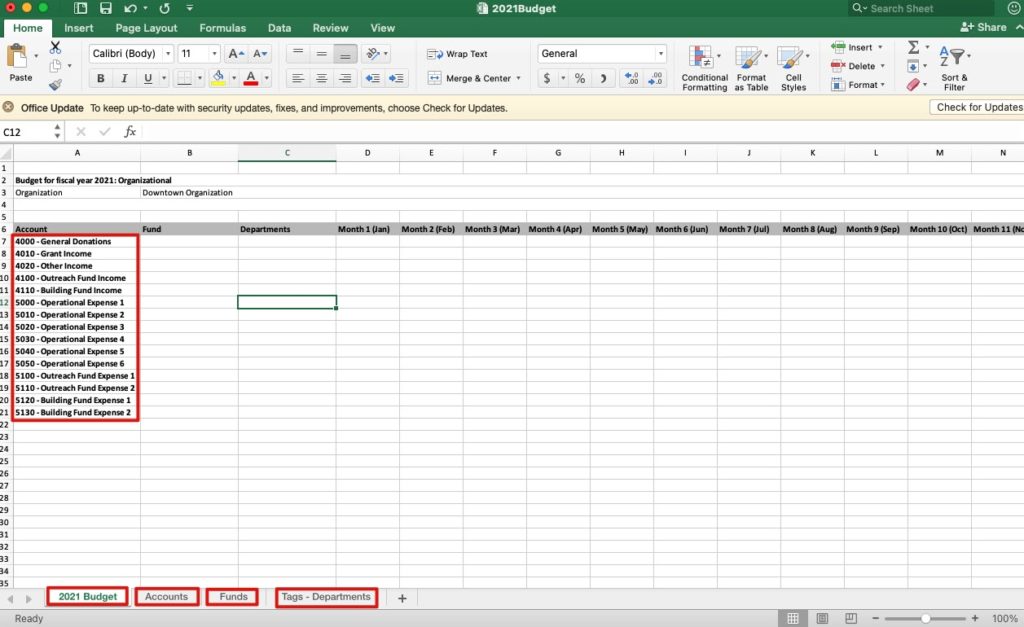
When creating your budget in your Excel file, each row will be a combination of your account, fund, and/or tag, along with the budgeted amount across 12 months.
For example, if you have an amount that needs to use “4000 – General Donations” as the account, “General Fund” as the fund, and “Services Department” as a department tag, you would enter all of those in the applicable columns and parse the amount out across the month columns. If an amount was not attributable to the “Services Department” tag, but was for the same account and fund, it would be a separate line with the applicable amounts.
The image below shows how this example would be entered on the worksheet. As you continue inputting your budget across 12 months, the rows you enter should represent every permutation of budget data you need to see in Aplos.

If a fund or tag is not applicable in a row, you can leave the cell blank and move forward. You can utilize formulas to insert your data into each cell.
Importing Your New Dimensional Budget
Once you have everything entered in the Excel file, save the file (.xlsx, .xls or .csv type required). In your Aplos account, navigate to Fund Accounting > Accounts > Budgeting. Click “Import,” and select the budget year. Click “Choose File,” select the file you saved, and click “Import.”

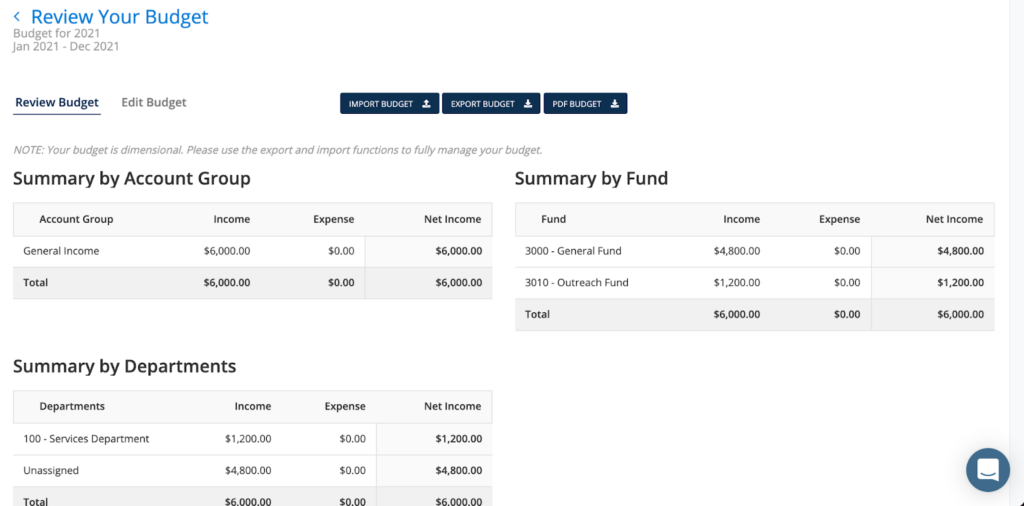
The next screen you see will be the Review Budget page, which shows the breakout of your budget across account groups, funds, and tags. This is now one master budget you can use for any combination of attributes. From this screen, you can export the budget, import another budget to replace the current one, or download a PDF version of the budget.
Editing Your Dimensional Budget
Editing Amounts For An Existing Account
If you need to edit your budget amounts, you can do so within the budget module. To begin, click “Edit Budget” on the Review Your Budget screen.

Here, you will see each line item and the monthly amounts that were imported from the Excel file. You can utilize the filters to view a specific account, fund, or tag.
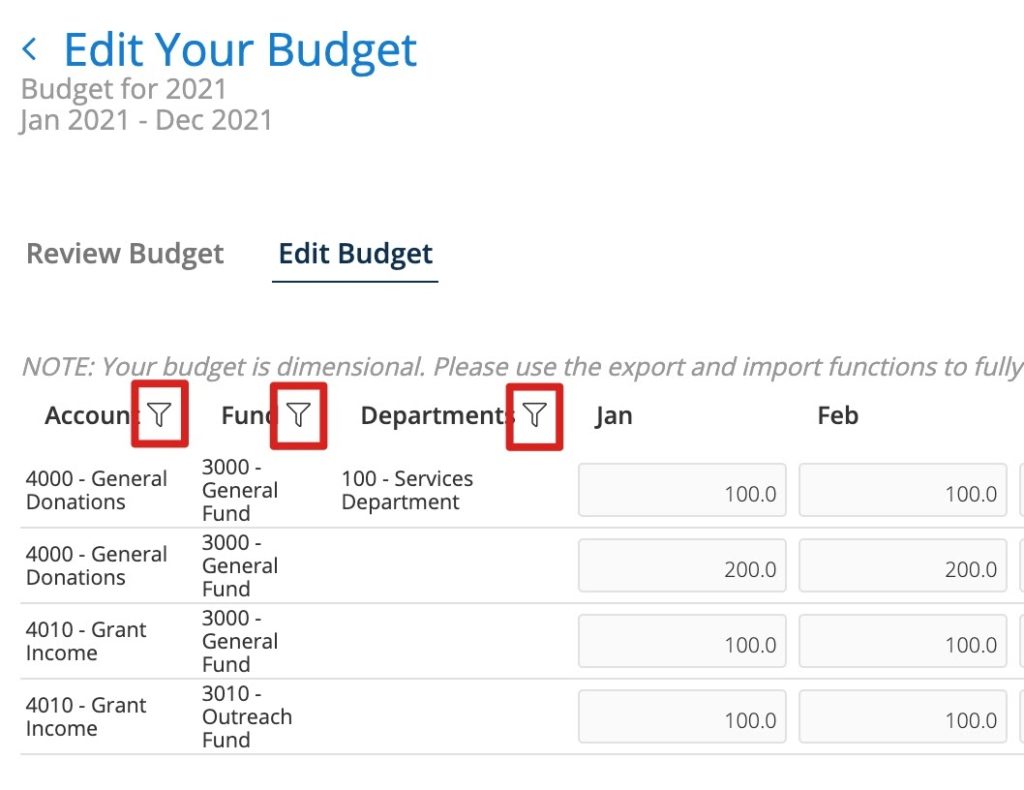
Now you can edit the monthly amounts for existing combinations. After adjusting the corresponding amounts, the budget will automatically save.
Note: If you desire to add or edit any combinations, you will need to make those changes on the Excel template and reimport your budget.
Add New Accounts, Funds Or Tags To An Existing Budget
If you need to add new accounts, funds, or tag combinations to an existing budget, export your existing budget to Excel. This will display your current line items with the monthly breakdown. We also recommend downloading the template file through the Budget import tab to collect your entire chart of accounts structure. Begin editing within Excel to add the new accounts, funds, or tags for the line items in addition to your current budgeted items.
Reimporting Your Budget
After completing the edits to your budget, you will begin to reimport the file with the updated budget. You can choose to import the file and create a new budget or choose to overwrite the existing budget in Aplos. If you choose to import the file as a new budget, refer to the section on Importing Your New Dimensional Budget.
To overwrite the existing budget, navigate to the Budgeting screen: Fund Accounting > Accounts > Budgeting. Select the appropriate budget and click “Import Budget.” This will prompt you to upload your Excel file. Click “Choose File,” select your file, and click “Import.” This will complete the import process.

Dimensional Budget Financial Reporting
If you have two Organizational budgets for the same year, you can select the budget you wish to have visible on your financial reports. From the Budget screen, check the box next to the budget you wish to use for your financial reports.

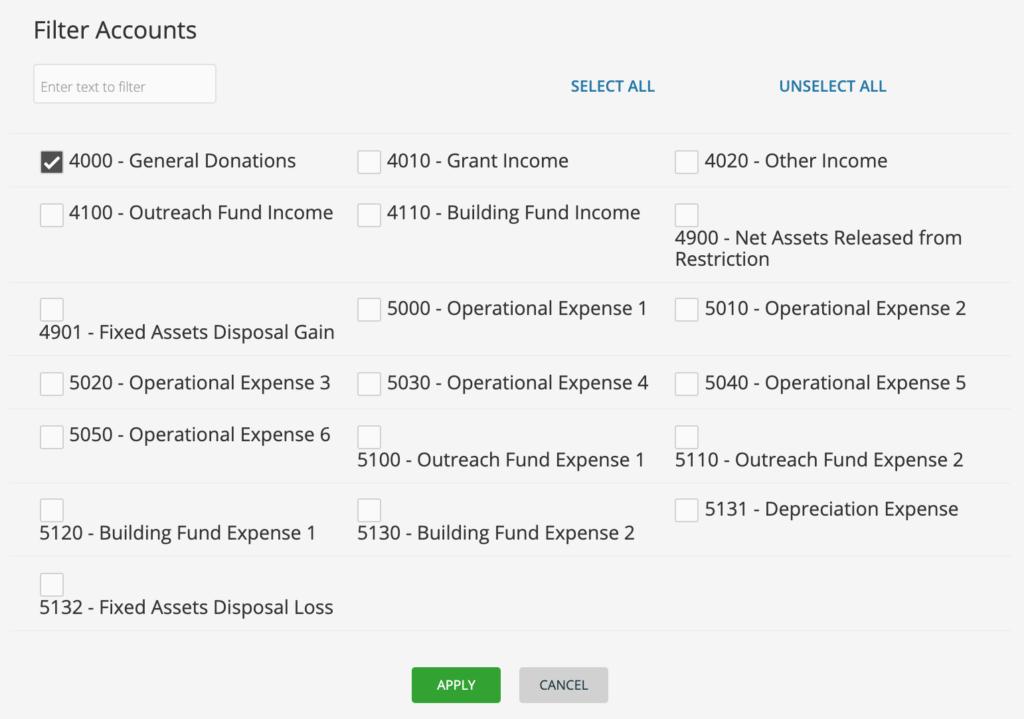
In the Budget to Actual report, you can view your master budget across timeframes and filters. In our earlier example, we budgeted for an amount that used “4000 – General Donations” as the account, “General Fund” as the fund, and “Services Department” as a department tag. In your Budget to Actual report, you can utilize the filters to gather the budget figures for that combination. To begin, locate the Budget to Actual report under Reports. Select your timeframe, and click “Report Filters” and then “Accounts.” Choose your account(s) and then click “Apply.”
Next, click “Report Filters” and then “Funds.” Select your fund(s) and then click “Apply.”

You can also filter by tags. Click “Report Filters” and then the associated tag. In our example, we used Departments. Select your tag(s) and then click “Apply.”

Now you have a Budget to Actual report that is filtered by account, fund, and tag for the entire year. This is a powerful report to utilize dimensional budgeting as you gain insight into any specific subsets.

With dimensional budgeting, you can also utilize more specific budget reports like the Budget by Fund report and the Budget by Tag report to quickly gather data. This will also allow you to filter by accounts, funds, and/or tags.

