Your chart of accounts is the backbone of your organization’s finances. Since every organization is different, your chart of accounts should be different as well. This guide will cover the process of setting up your chart of accounts in Aplos, and it includes a video tutorial to walk you through the process.
Adding a Fund
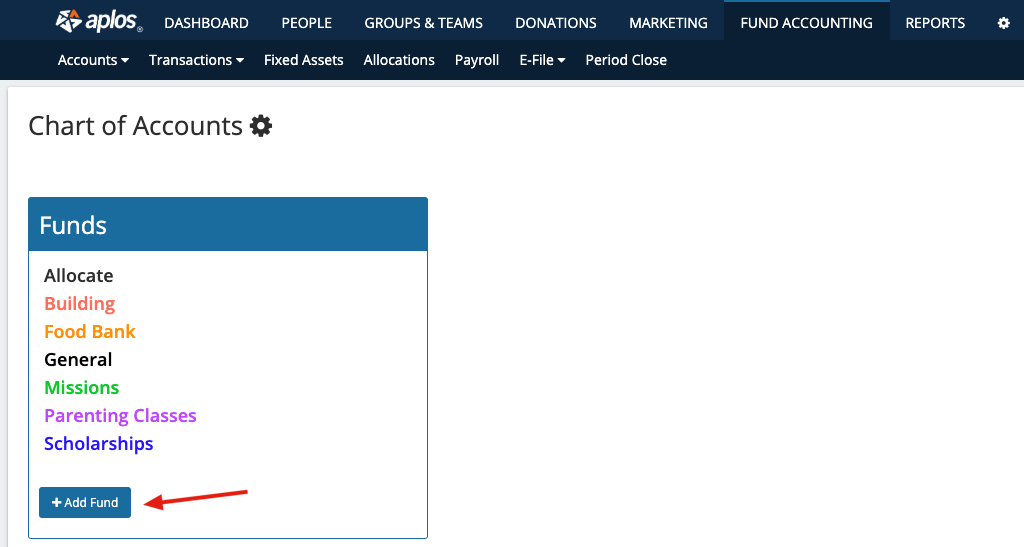
Locate the Fund category on the page, and click on the “+ Add Fund” option. This will then prompt you to assign a name and color to your Fund.

The color you assign to your fund will be helpful in identifying your fund on the Chart of Accounts page, as well as in the Fund Balance Chart that appears within your Register accounts, such as checking, savings, or credit card.
Adding a New Account or Account Group
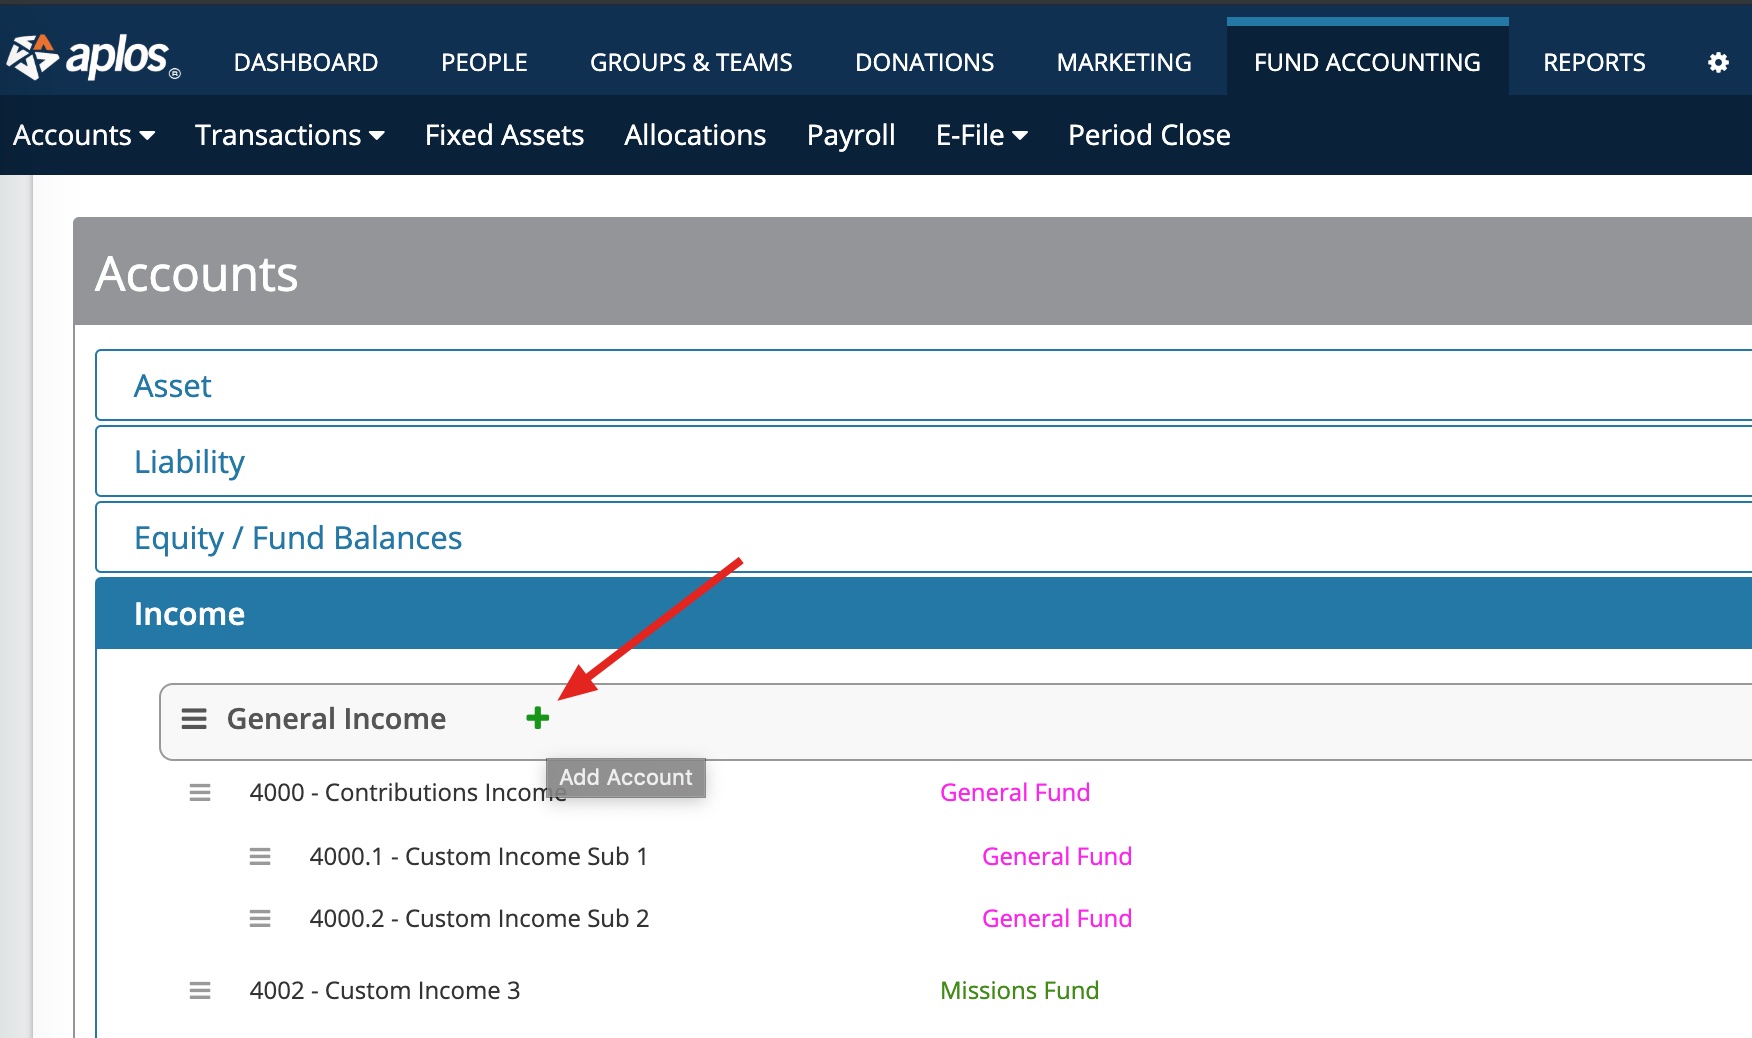
To add a new account, click the green plus (+) icon on the Account Group where that account should be listed.

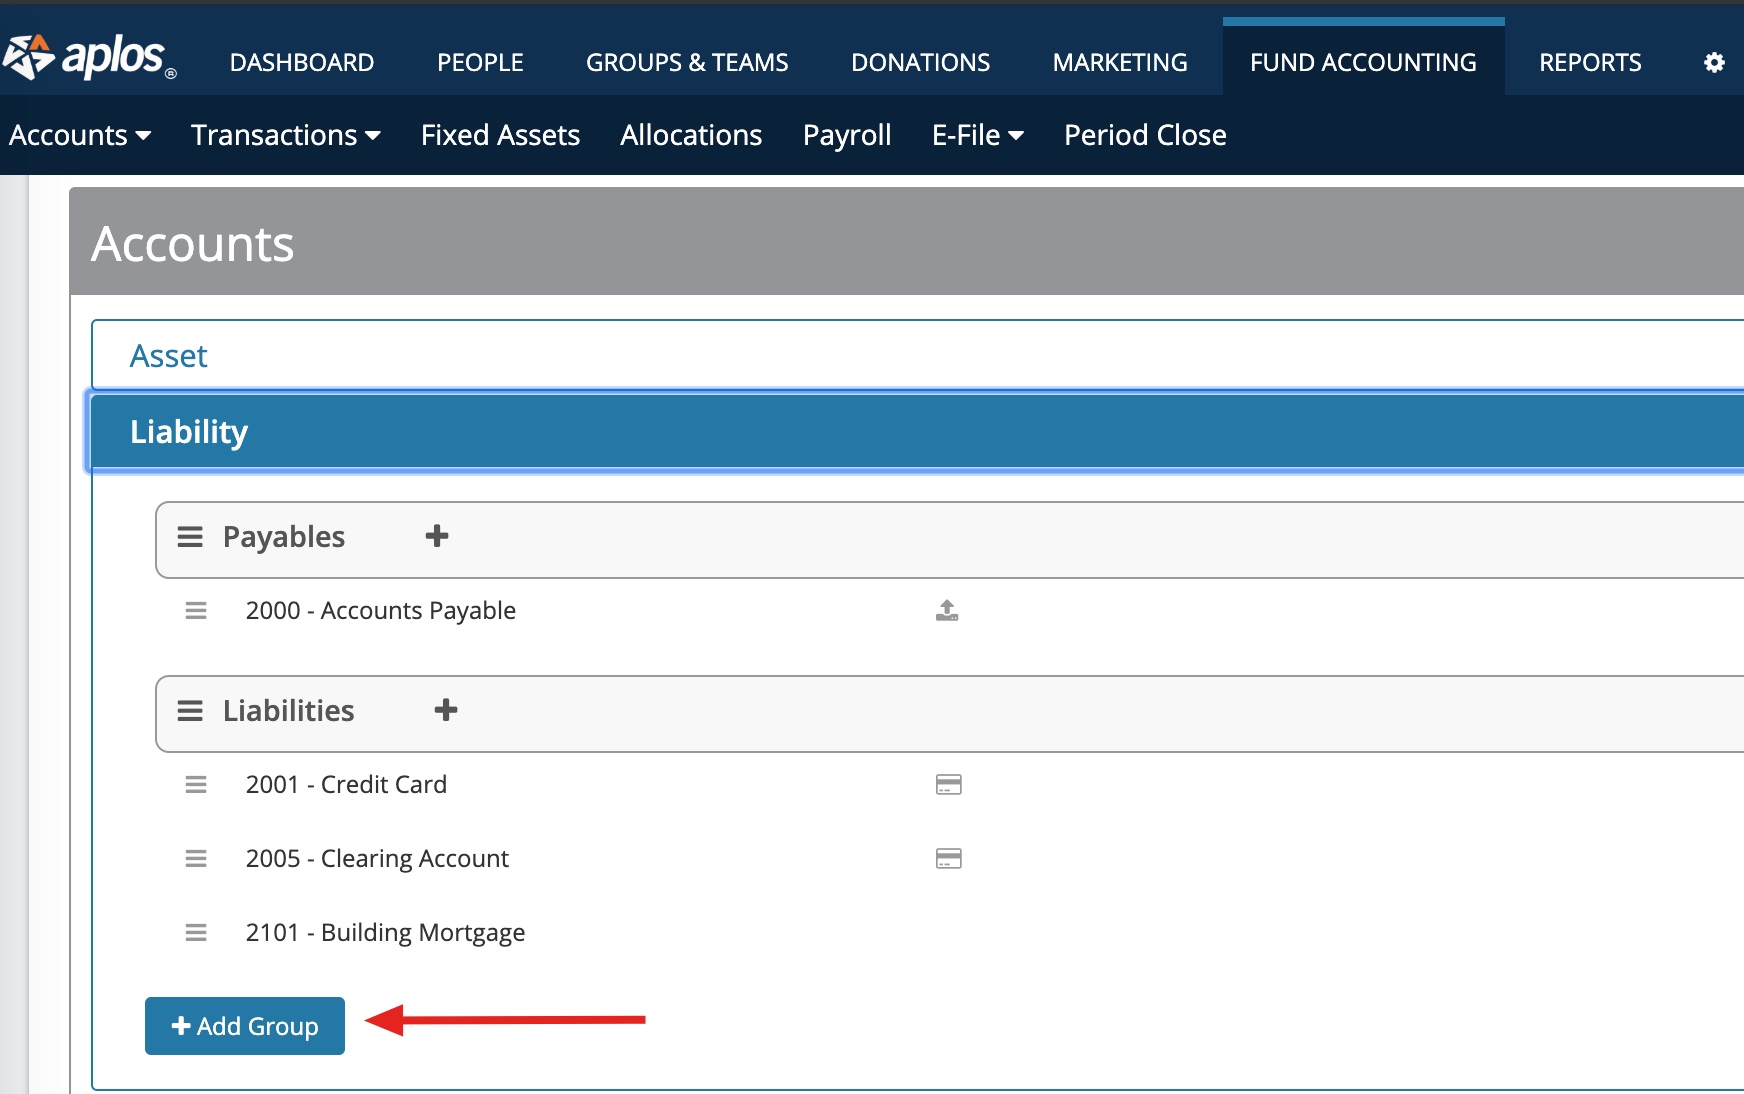
*If you need to create a new Account Group, you’ll find the option to add this from the bottom of each account category (shown below).*

From there, you will assign an account number and name. Then you can enter values for optional fields, such as assigning a default fund or making that account a sub-account.

Assign to a Fund or Sub-Account
Populating the Fund field will assign a default fund for the account so the fund will automatically populate when recording a new transaction with that income/expense account.
If you are making a Sub-Account, you’ll need to check the box for “Make this account a sub-account.” Then enter what the parent/main account should be. (See example above.)
Account Type
If you are creating an asset or liability account, you will be asked to select a Type and Activity for that account.
Type refers to how you would like to use the account in the software. The three options are:
- Use as a Register – You would select this option if you record transactions to that account and want to see a running balance for it. You can then choose to work in that account in the Register screen. A good example of this would be a bank account, like a checking or savings account.
- Accounts Receivable/Accounts Payable – You would choose this option if you use this account to hold a balance for your invoices/bills and want to select this in the Accounts Receivable/Accounts Payable modules in the software.
- None – You would use this option if the account does not meet the previous criteria but you would still like to use it for transactional purposes. An example of this would be an account for a Fixed Asset your organization owns.
What Is an Account Activity?
Activity refers to how you would like the account to appear on the Statement of Cash Flows report in the software. The four options are:
- Cash
- Operating – This option is for the changes in cash other than those reported in the investing and financing sections.
- Investing – This refers to the amounts spent to purchase long-term assets, such as equipment, vehicles, and long-term investments. The investing section also reports the amount received from the sale of long-term assets.
- Financing – This refers to the amounts received from borrowings and repayments.
*If you would like more clarification about these options, view a resource from the Accounting Coach that covers how a Statement of Cash Flows works.*
Advance Options for Your Chart of Accounts
If you are looking for more granular reporting, such as classes, locations, or projects, you will want to consider using tags to add layers to your reporting. Tags allow you see a filtered view of certain financial reports without adding complexity to your chart of accounts. See the full resource on Accounting Tags In Aplos.
Enable Account or Disable Account With Account Status
You’ll also notice a Status field when building your accounts. This field allows you to mark an account as Enabled or Disabled.
- Enabled means you would like this account to be active in the system so you can record transactions to it.
- Disabled means you no longer wish to use this account when recording new entries. Although inactive, this account will still appear on reports if there is transaction data tied to it.
Once your chart of accounts is set up, you can enter the starting balances for your asset and liability accounts from your Starting Balances page. For more documentation about this step, read this support resource on Starting Balances.
Account Segments
You can use account segments to run reports for specific accounts. Account segments allow you to filter selected portions of the accounts you created for easy report generating. Depending on how you have set up your chart of accounts, you might find it helpful to pull reports for accounts for a specific department or ministry. Account segments make that possible. To create your account segments and quickly generate reports filtered by those segments, you can follow the steps below.
Creating Account Segments
You can create your segments from the Account Segments tab on your Chart of Accounts page. Create your first segment by clicking the green plus (+) icon.

From here, you will name your segment and select the accounts. For example, if you’d like to see reports for specific income and expense accounts within a department, you can choose each of those accounts. You can also select an entire account group, which will select all of the accounts within that group. Once you have all of the necessary accounts selected, click the “Add” button at the bottom of the page.
Using Account Segments in Financial Reports
Now that you have your account segments ready, you can filter your reports by an Account Segment. The reports that you can filter by account segments are Transaction List by Account, Comparative Income Statement Periods and General Ledger.
From within these reports, you will click “Report Filters” and then “Segments.” Choose the segment you’d like to filter your report by, and click “Apply.”

Now you can export, print, save, or share your reports from the options at the top of your report page.
If you have any questions about this process, reach out to our Support Team.
Importing Your Chart of Accounts
If you are coming from another software and you already have a chart of accounts that you would like to use in Aplos, we can import your chart of accounts for you.
The template file is attached so you can copy your information into it and then contact us to import it. Please note that importing a chart of accounts will replace any transaction data currently in your account.

