An important part of completing your Aplos account is entering the information that will be populated on Aplos reports (like Contribution Statements), invoices, and email communication. You can also upload a logo to use on your Aplos homepage as well as other modules of the software.
You can enter or update this information on the Org Info page. It is easy to enter and complete within a few minutes. The Administrator of your Aplos account can do this by going to Settings and selecting the Org Info tab.

Setting Your Organization’s Information
Begin by clicking “Update Org Info” to complete the fields that are required and applicable for your organization, including name, Tax ID (EIN), address, phone number, website address, and currency type.
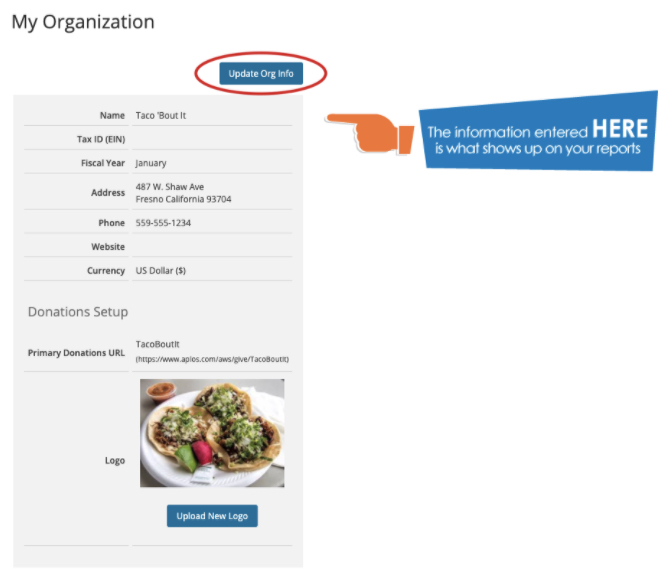
Edit Your Organization’s Name, Address, and Phone Number
You can add your organization’s name and address as you would like it to appear on your Aplos account and various reports.
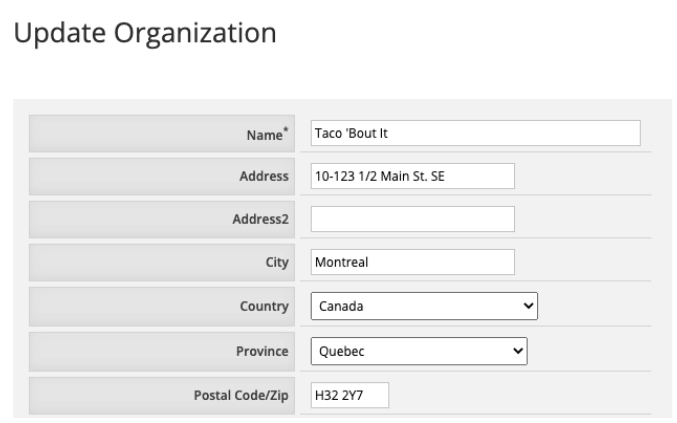
Aplos also allows you to enter foreign addresses and countries with provinces, allowing for spaces in postal code and two address lines to accommodate various postal formatting.
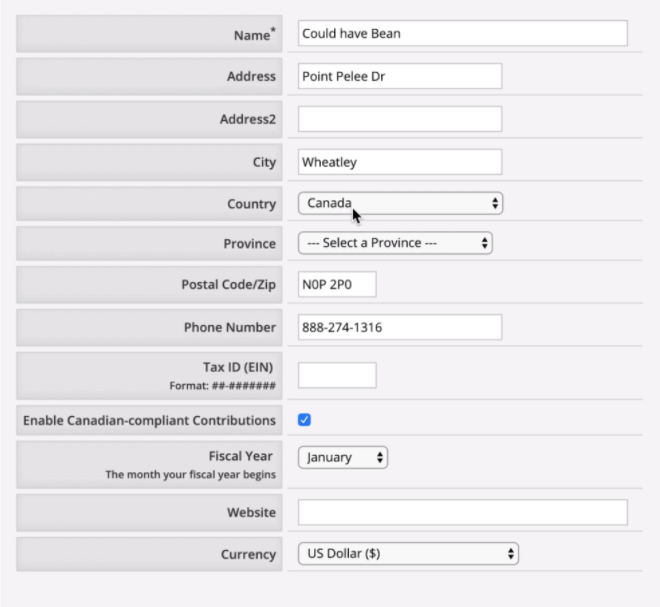
Here’s an example of a Canadian address and how that will format on your Org Info page:
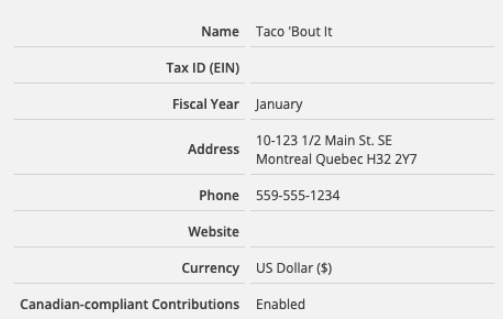
The formatting will hold after you save and be shown like the following:
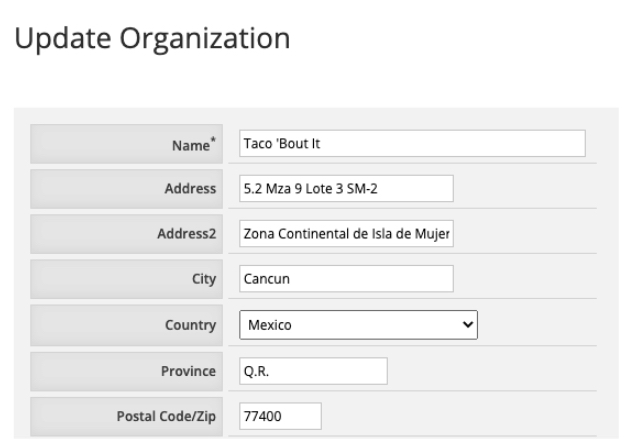
Here is an example of another foreign country’s postal formatting:
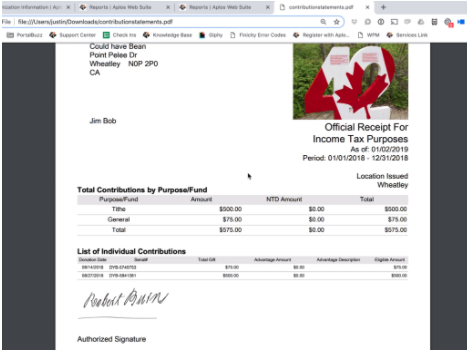
After you enter the information, this is how the formatting will appear on your Contribution Statement:
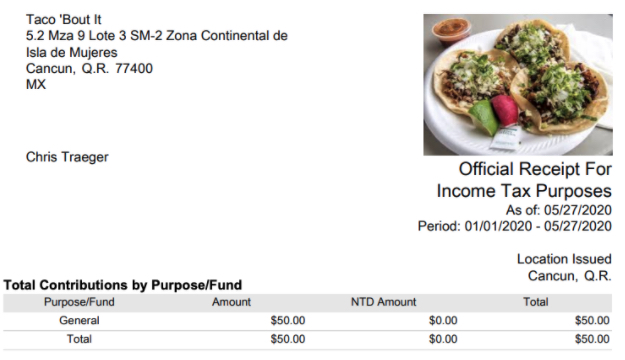
The information you enter on the Org Info page will show up in the following modules within Aplos:
- Report headers
- Contribution Statements
- Email footers
- Invoices
Provide Your Tax ID (EIN)
The Tax ID (EIN) number added on this page will be generated on your Contribution Statements to your donors, which is why it is helpful to add this as you set up your Aplos account. The typical format is for a United States EIN or a Canadian EIN. This number is the Tax ID for your nonprofit organization, and not your personal Tax ID number. You should never provide a Social Security number in this location.
Set Your Fiscal Year
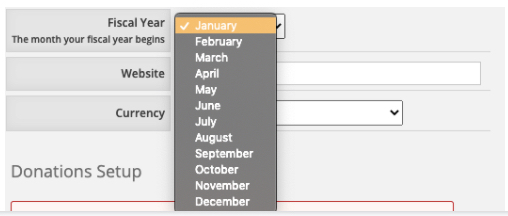
Setting your fiscal year is important because it sets the parameter when you create a budget and run financial reports. Your fiscal year allows the system to know what start and end date to reference as you run budgeting figures.
You can toggle to the month your fiscal year begins to select it.
Changing the Default Currency and Using International Currency
The fundamentals of accounting are the same around the world, so you can use Aplos to manage the bookkeeping in any country. You can select the currency symbol needed by your organization, and this will change the currency symbols in your account and reports.
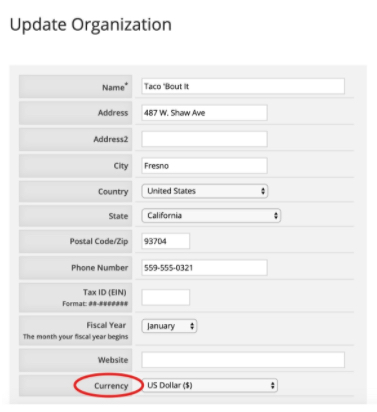
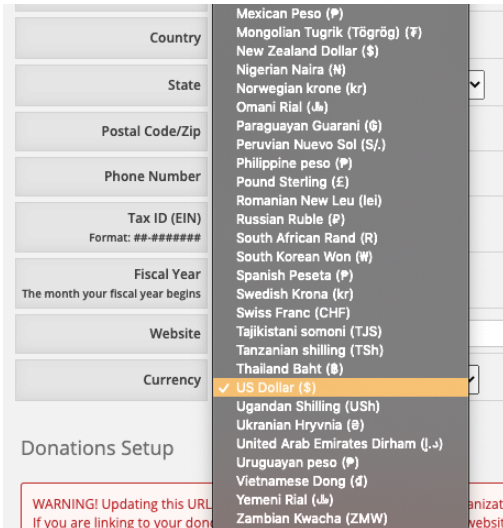
To change your currency symbol, you can scroll to the Currency field and make your selection. If you do not see your preferred currency listed, you can contact us to submit a request for a different currency. If no changes are made to this field, the default currency will appear as USD (US Dollar). Please note more currency options are available than are shown in the screenshot below.
Using Multiple Currencies and Applying Exchange Rates
You are able to manage multiple currencies within Aplos, since you are able to set up multiple bank accounts (asset accounts) within one account and manage each account balance in their respective currency values. However, this can prove confusing when running reports since the system does not apply exchange rates.
If you need to manage multiple currencies in Aplos and run correct reports, you would manage the two currencies in separate Aplos accounts. You would have the ability to oversee these accounts using Aplos Oversight. The Aplos Oversight platform includes the ability to access and manage multiple accounts, designate various currencies, apply exchange rates, and create consolidated financial reports. View our article on “Setting Up An Oversight Account.”
Enabling Canadian Compliance for Contribution Statements
If you are a Canadian organization, we have a few setup steps to complete so your Contribution Statements fall in line with Canadian compliance.
To enable the feature, select Canada as your country. Once you select Canada, you will see the option “Enable Canadian-compliant Contributions.” Make sure that is checked.
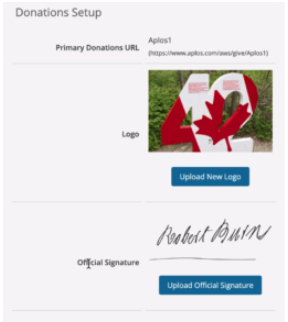
Once that has been selected, you will see a section for you to upload an “Official Signature” on the Org Info page that will be displayed on each Contribution Statement.
Once that is done, you will simply run the Donations by Contact report to generate those statements. For more info on how to do that, see our article on “Generating Contribution Statements.”
After you run that report and download the statements, they will look something like this. You will see the signature at the bottom of the statement. Each individual contribution will also have its own serial number, which is a requirement of Canadian Contribution Statements. These will be automatically generated with the statement.
Setting Your Donations URL
You can also set and customize your donation URL. This will be the portion of the URL for your online donation forms that will show your organization’s name. For example, an online donation form URL will be: https://www.aplos.com/aws/give/YOURNAME/donate.
When you add in your organization’s name (or abbreviation, if you choose), it will be updated here.

For example, let’s say the organization’s name is “New Life Assembly of God.” You can enter “NewLifeAG” in the Primary Donations Setup, and your online donation form URL will be: https://www.aplos.com/aws/give/NewLifeAG/donate.
Add a Logo to Reports and Emails
If you wish to further customize your Aplos account for your team, and as you generate reports, you can upload your own logo.
You will be able to click “Upload New Logo” and select a logo from your device. While there is no limit on the file size for your logo, we find that files larger than 76 KB take a bit longer to load as you navigate your account. We recommend using a .jpg or .png file.
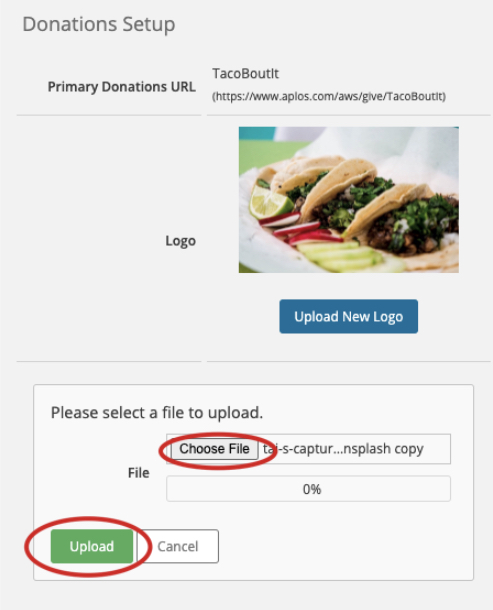
Once you click Upload New Logo, a field will appear below where you can select the file you’d like to upload as your logo. You’ll click Choose File to open the dialog box and select the file of your choice. Once you’ve made your selection, you’ll click the green Upload button to add it to your account.

You do not have to add a logo for your organization. If you choose not to, there will simply be a blank area where a logo would sit in your Aplos account, as well as in your reports. You will be able to add or update a logo from this page at any time.
Managing Your Communication Settings
You’ll want to double-check your Communication Settings to ensure everyone who needs to receive communications about your Aplos account is notified. To update or add an email address to any section, you’ll click on Update Communications.
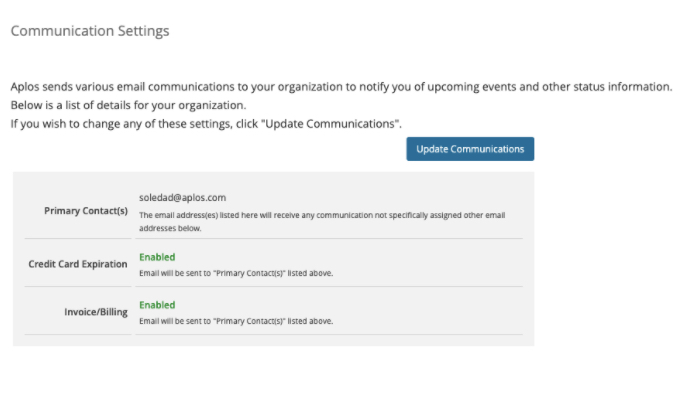
Primary Contacts will receive any communications that have not been specifically assigned to other email addresses below. Both the Credit Card Expiration and Invoice/Billing notifications can be sent to specific individuals, like a treasurer or financial secretary, if needed.
Aplos will send notifications, such as billing notifications, to the email addresses listed on this page, which is why it is important to enter and update this section as necessary. Individuals do not need to be an active user on the Aplos account in order to receive these notifications.

