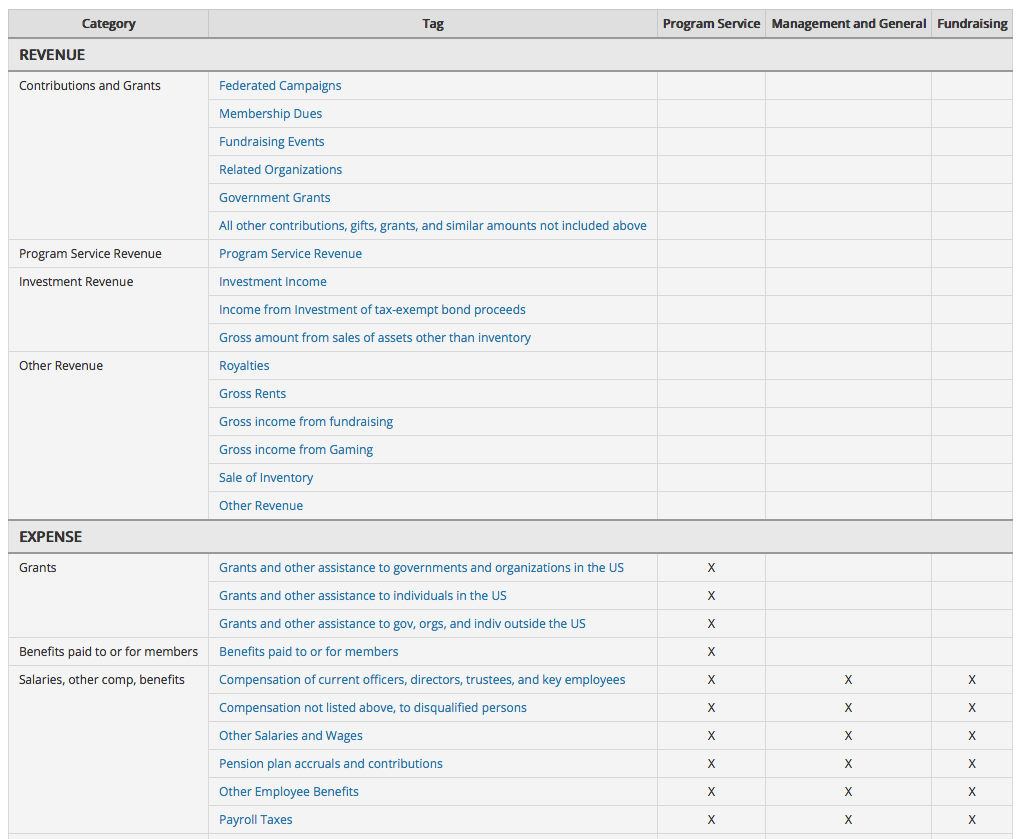
990 Tags allow you to select the applicable 990 category for each transaction you enter in Aplos. Using these tags will allow you to easily generate a 990 Income Statement to assist you in filing your 990 return.
Enabling and using 990 Tags happens in 3 main steps:
- Enabling and managing 990 Tags
- Entering Transactions
- Running the 990 Report
Step 1: Enabling and managing 990 Tags
When logged in, go to Accounts and click on Tags at the top of the screen. Here you’ll see your Fundraisers, Projects, Department, and Custom Tags as well as the tab for 990 tags on the end. 
You’ll want to make sure these are enabled and then you can begin mapping out the 990 tags (categories) to the appropriate accounts. For instance, you would click on the category for “All other contributions, gifts, grants, and similar amounts not included above”, and select your “4000 – Contributions Income” account, and/or anything else that applies. Click Update when you have selected the account(s) that are applicable to that 990 category.

If you have specific questions regarding which accounts should be included for certain categories, we recommend contacting a tax professional. Once you’ve mapped all accounts and categories, proceed to Step 2.
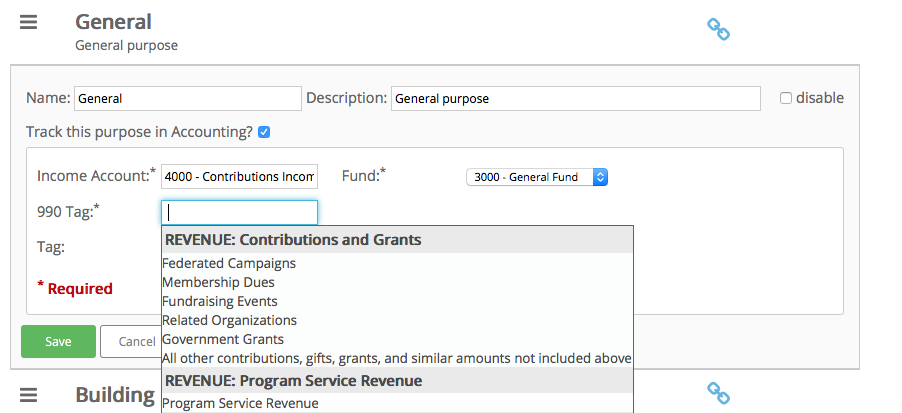
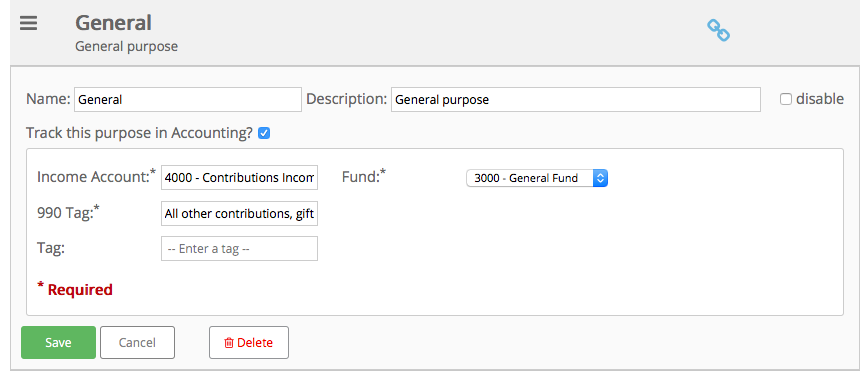
You can also assign the appropriate 990 tags to the Purposes you use in Donations. This is part of the process in linking your purposes to an income account and fund so that they can be tracked in Accounting. You’ll notice the 990 tag field is also required, just like it is in Accounting.

You can hit the spacebar within this field to view a list of the 990 tags to select from. The assigned 990 tag will be listed in the field once selected:
Step 2: Entering Transactions
Now that you have 990 Tags enabled, and have mapped all accounts to their applicable 990 categories, you may enter transactions. This process looks exactly as it did before enabling these Tags, however you will now notice a new field called “990 Tag”. As you enter both income and expense, Aplos is going to ask you which Tag (e.g. program service, management and general, or fundraising) you would like to use. Since you have mapped all categories to your accounts, the selection is based on which 990 Tags you’ve chosen. The list of tags given in your 990 Tag field will be limited to the accounts that you mapped out in the previous step.

To use the earlier example, if I enter a transaction using my “4000 – Contributions Income” account, the tag for “All other contributions, gifts, grants, and similar amounts not included above” will be listed. Select the applicable 990 Tag, and the transaction should save.
The 990 Tag is a required field, so it will need to be selected before a transaction will save. If you do not know which Tag to select, you may select “Other Revenue” or “Other Expense” for the time being. Also, if the list of 990 Tags is not appearing, press the spacebar and the list should appear.
Step 3: Running 990 Reports
Now that you have mapped all accounts to their applicable 990 categories, and entered transactions using these Tags, you can generate 990 reports. When you navigate to the Reports section of Aplos, you’ll see these reports avaiable
- Form 990 Revenue
- Form 990 Expense
- Transaction List by 990 Tag
- Missing 990 Transaction List (shows transactions that are missing a 990 tag assignment)
You’re able to Share, Save, Print or Download these reports. Again we recommend reaching out to a tax professional if you have questions regarding best-practices or requirements for your organization.
Please be aware that this process does not automatically tag each transaction for you. It simply allows you to choose a default tag for each income or expense account so that the process of entering transaction and choosing the appropriate tag is a bit more simple.
Note: Enabling any Tag Dimension will automatically update your subscription price. For further review on the cost of enabling Tags, please view your Subscription Page.


